As an athlete, your body is your greatest asset, and maximizing your performance requires more than just strength and speed.
One often overlooked aspect of athletic prowess is mobility – the ability to move freely and efficiently through a full range of motion.
Whether you’re a professional athlete or a fitness enthusiast, incorporating mobility exercises into your training regimen can enhance your performance, prevent injuries, and promote overall well-being.
In this blog post, we’ll dive into some of the best mobility exercises that athletes can incorporate into their routines.
These exercises are designed to target key muscle groups, improve joint flexibility, and enhance overall athletic performance.
So, let’s get off the ground:
Most Effective Mobility Exercises For Athletes
Listed below are some of the best mobility workouts for athletes that are certain to produce results:
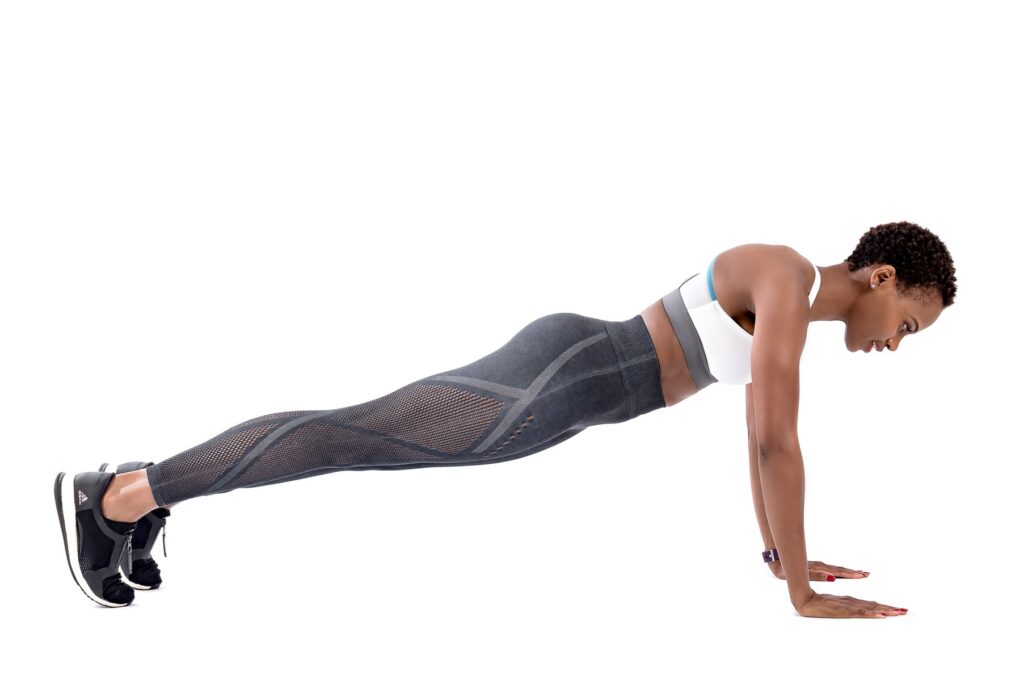
1. Spiderman Lunges
Spiderman Lunges, also known as Spiderman Crawls, is a dynamic mobility exercise that targets the hips, thighs, and core muscles. They mimic the crawling movements of Spiderman, hence the name.
Follow these steps to perform Spiderman Lunges correctly:
Warm-Up
- Start with a brief warm-up to get your body ready for exercise. Perform some light cardio, such as jogging in place or jumping jacks, to increase your heart rate.
- Do some dynamic stretches for the hips, like leg swings and hip circles, to prepare the hip joints for the lunges.
Starting Position
- Stand with your feet shoulder-width apart and your arms at your sides.
- Engage your core muscles to stabilize your spine.
Perform the Lunge
- Take a step forward with your right foot, lunging into a regular forward lunge. Your right knee should be directly above your right ankle, forming a 90-degree angle.
- As you lunge forward, simultaneously bring your left hand down to the ground on the inside of your right foot.
- Keep your left leg extended behind you, with the toes pointing down, like the starting position of a crawling movement.
- Ensure your chest is lifted and your back is straight.
Return to Starting Position
- Push through your right foot’s heel to bring your right leg back to the starting position.
- Simultaneously lift your left hand off the ground and return it to your side.
Switch Sides
- Repeat the same sequence on the opposite side. Step forward with your left foot, lunge, and bring your right hand to the ground inside your left foot.
- Perform the required number of repetitions or continue alternating sides in a fluid motion.
Breathing
- Inhale as you step forward into the lunge.
- Exhale as you return to the starting position.
Pro Tips
- Engage your core: Keep your abdominal muscles engaged throughout the exercise to stabilize your spine and enhance the effectiveness of the movement.
- Maintain proper form: Ensure your front knee is aligned with your ankle and doesn’t go past your toes during the lunge to protect your knee joint.
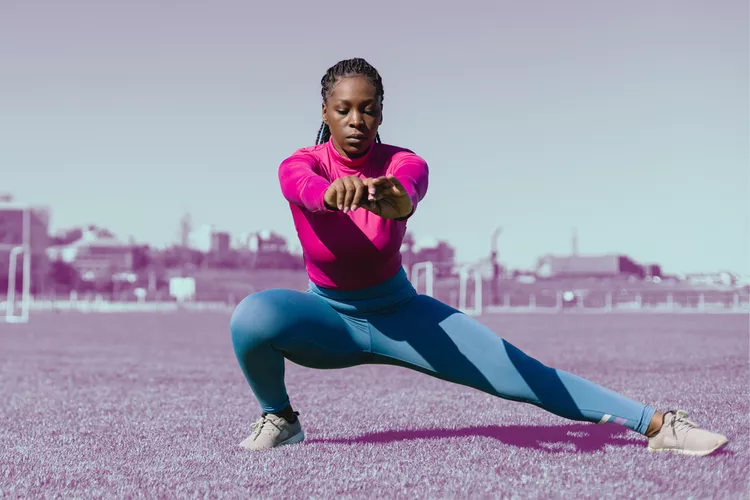
2. Cossack Squat
%3Amax_bytes(150000)%3Astrip_icc()%2FCossack-Squats-Stocksy_txp91705aaa6FY300_Medium_4007530-53f498a70b4740e9af9f970f2ac4d55b.jpg&tbnid=Iq6iz91O_N-g8M&vet=12ahUKEwj4lPqV5peAAxVPuicCHYPoDLAQMygBegUIARDyAQ..i&imgrefurl=https%3A%2F%2Fwww.shape.com%2Fcossack-squat-6754969&docid=pEsUsGIIqKd7VM&w=1500&h=1000&q=Cossack%20Squat&ved=2ahUKEwj4lPqV5peAAxVPuicCHYPoDLAQMygBegUIARDyAQ)
The Cossack Squat is a powerful lower-body exercise for athletes that targets the hips, thighs, and groin while enhancing flexibility and balance. It is an excellent movement for building strength in the legs and improving mobility.
Follow these steps to perform the Cossack Squat correctly:
Warm-Up
- Begin with a warm-up to increase blood flow to your muscles. For a few minutes, Perform light cardio exercises like jogging or jumping jacks.
- Do dynamic stretches for the hips, such as leg swings and hip circles, to prepare for the squatting movement.
Starting Position
- Stand with your feet much wider than shoulder-width apart. Toes should be pointing slightly outward.
- Keep your back straight, shoulders relaxed, and chest lifted.
- Extend your arms straight in front of you for balance.
Perform the Cossack Squat
- Shift your weight to one side as you begin to bend that knee, lowering yourself into a deep squat on that side.
- Keep your other leg straight, with the foot flat on the ground and the toes pointing upward.
- Try to keep your extended foot’s heel on the ground as you squat down to ensure proper form.
- Lower your body as much as you can comfortably, but avoid going beyond a point where you feel strain or pain.
Return to the Starting Position
- Push through the heel of the bent leg to rise back up to the starting position.
- As you return to the upright position, keep your back straight and your core engaged for stability.
Switch Sides
- Repeat the same sequence on the opposite side, shifting your weight to the other leg and performing a squat on that side.
- Continue alternating sides for the desired number of repetitions or times.
Pro Tips
- Gradually increase depth: Start with shallow squats and gradually work your way into deeper squats as your flexibility and strength improve.
- Use your arms for balance: Extend your arms in front of you or place your hands on your hips to help maintain balance during the squat.
Mobility Workouts For Athletes
Let’s take a look at some mobility exercises for athletes that will take your athletic performance to new heights:
3. Pigeon Pose
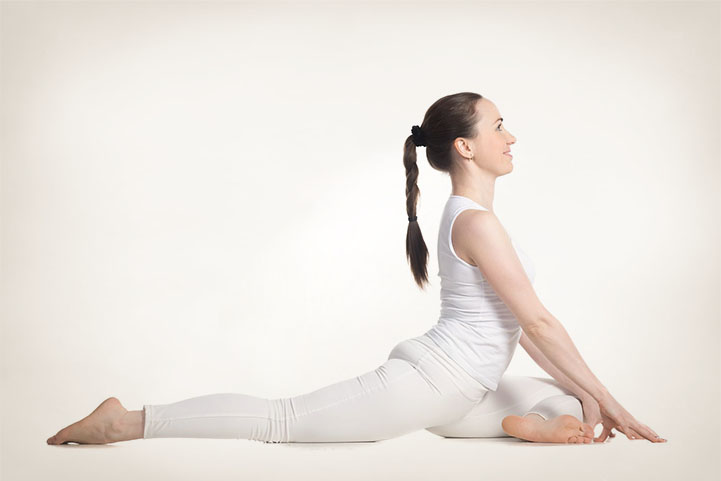
Pigeon Pose, also known as Eka Pada Rajakapotasana, is a great mobility workout for athletes that provides a deep stretch for the hips and thighs. It is essential to approach this pose with mindfulness and respect for your body’s limitations.
Follow these steps to practice Pigeon Pose correctly:
Preparation
- Find a comfortable yoga mat or a soft surface to practice on.
- Start with a warm-up to prepare your body for the pose. Perform some gentle stretches for the hips, thighs, and lower back.
Starting Position
- Begin in a tabletop position with your hands and knees on the mat. Ensure your wrists are under your shoulders and knees under your hips.
- Slide your right knee forward, placing it behind your right wrist. The right foot should be positioned near your left wrist.
Leg Positioning
- Extend your left leg straight back, keeping the hips squared to the front of the mat. Ensure your left thigh is parallel to the long edge of the mat.
- Point your toes and rest the top of your left foot on the mat. The outer edge of the left leg should be on the floor.
Alignment
- Check your alignment. Your right shin should be at a slight diagonal, and your hips should be level.
- Keep your back leg extended, and avoid collapsing into your right hip by engaging your core muscles.
Hands and Torso Positioning
- Place your hands on the mat in front of you, framing your right knee.
- Lengthen your spine and keep your chest lifted. Avoid rounding your back.
- You can walk your hands forward, lowering your chest towards the mat for a deeper stretch if possible. Only go as far as it feels comfortable.
Breath and Hold
- Take slow and deep breaths as you hold the pose. Inhale to lengthen the spine, and exhale to deepen the stretch.
- Hold the pose for about 30 seconds to 1 minute on each side. You can gradually increase the holding time as your flexibility improves.
Switch Sides
- To release the pose, press your hands into the mat and slowly lift your torso back up.
- Slide your right knee back to the tabletop position.
- Repeat the same steps on the opposite side, bringing your left knee forward.
Pro Tips
- Use a prop: Place a folded blanket or cushion under your right hip if your hips are tight to elevate it slightly. This can make the pose more accessible and comfortable.
- Modify the stretch: If you find it challenging to fold forward, you can practice an upright variation by keeping your torso upright and not folding forward.
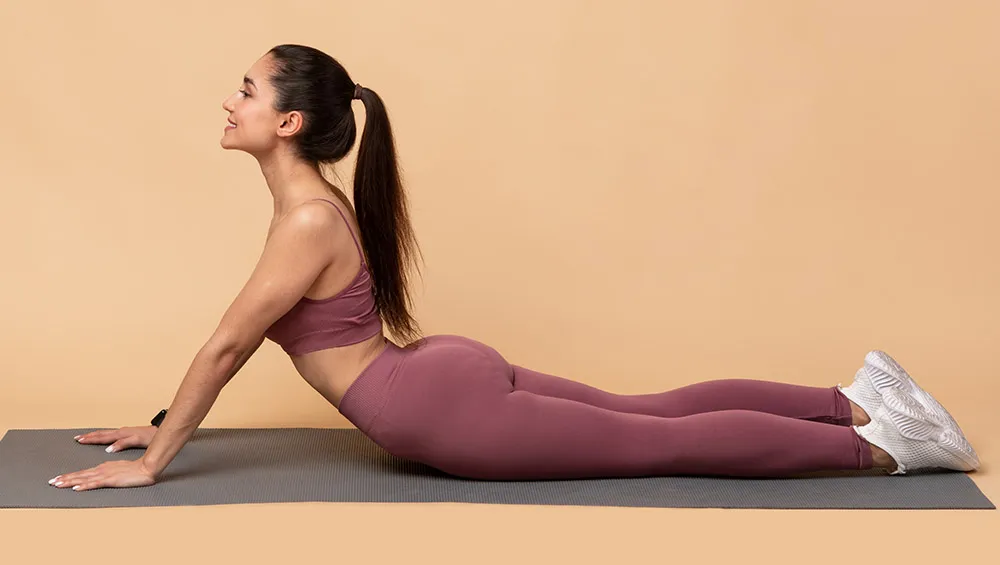
4. Cobra Stretch
The Cobra Stretch, also known as Bhujangasana, is a yoga pose that stretches and strengthens the chest, shoulders, abdomen, and lower back muscles. It is an excellent mobility exercise for improving spine flexibility and relieving tension in the upper body.
Follow these steps to practice the Cobra Stretch correctly:
Hand Positioning
- Place your palms on the mat, directly underneath your shoulders.
- Spread your fingers wide and press your palms firmly into the mat to support your upper body.
Leg Positioning
- Keep your legs close together, with your toes pointed outward.
- Press the tops of your feet into the mat to engage your leg muscles.
Engage Your Core
- Engage your core muscles by drawing your navel towards your spine. This action stabilizes your lower back and protects it during the stretch.
Inhale and Lift
- Inhale deeply as you gently lift your upper body off the mat. Start by lifting your head, then your chest, and finally, your abdomen.
- Use the strength of your back muscles rather than pushing with your arms to lift your upper body.
- Keep your elbows slightly bent and close to your body throughout the movement.
Shoulder Positioning
- Roll your shoulders back and down, opening your chest and creating space in the front of your body.
- Avoid shrugging your shoulders up towards your ears.
Neck Alignment
- As you lift your chest, avoid craning your neck. Instead, keep your neck in line with your spine, looking forward or slightly upward.
Breath and Hold
- Take deep breaths as you hold the Cobra Stretch. Inhale to lift a little higher, and exhale to maintain the position.
- Hold the stretch for 20-30 seconds, breathing steadily throughout.
Release
- To release the pose, exhale and slowly lower your upper body back down to the mat with control.
- Rest your forehead on the mat and relax for a moment before repeating the stretch if desired.
Pro Tips
- Use your back muscles: Focus on using the strength of your back muscles to lift your chest rather than relying too much on your arms.
- Gradual progression: If you are new to the Cobra Stretch, start with a gentle lift of the chest and gradually increase the range of motion as your flexibility improves.
5. Cat Cows
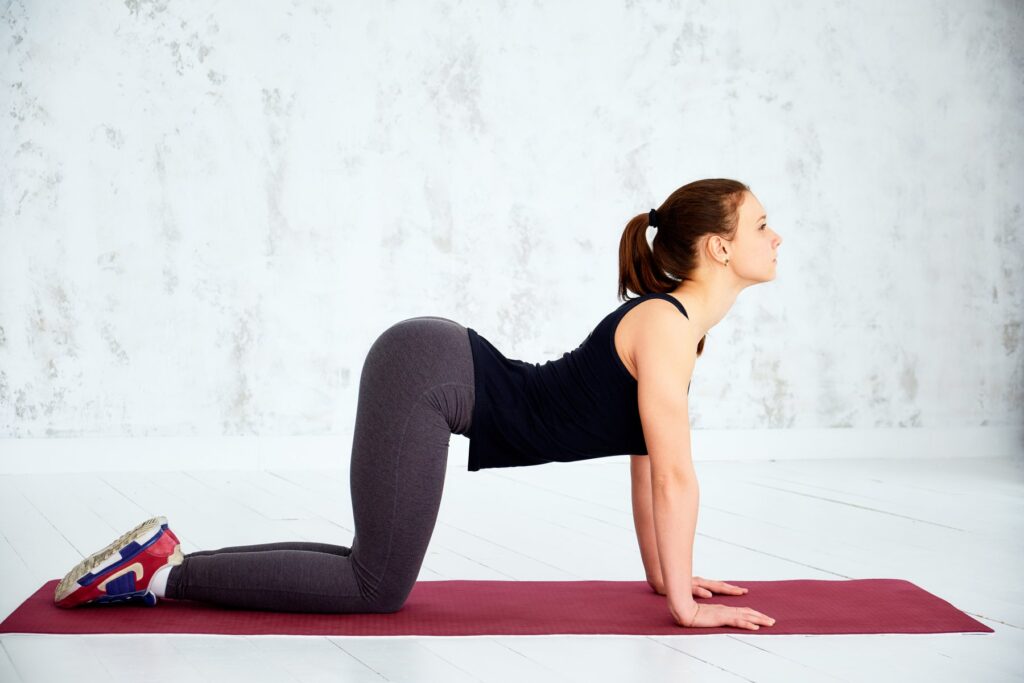
Cat-Cow Pose is a gentle and flowing mobility stretch for athletes that helps to warm up the spine, improve flexibility, and release tension in the back and neck. It consists of two movements that complement each other.
Follow these steps to practice Cat-Cow Pose correctly:
Starting Position
- Begin on your hands and knees in a tabletop position. Your wrists should be aligned under your shoulders, and your knees under your hips.
- Place your palms firmly on the mat, spreading your fingers wide for stability. Your knees should be hip-width apart.
Cow Pose
- Inhale deeply as you gently arch your back. Lift your head and tailbone towards the ceiling, allowing your belly to sink towards the floor.
- Look forward or slightly upward, opening your chest and drawing your shoulder blades together.
- This is the Cow Pose, with your spine in a gentle backbend.
Cat Pose
- Exhale slowly as you round your spine upward. Tuck your chin towards your chest and draw your navel towards your spine.
- Imagine you’re pulling your belly button towards the ceiling, creating a deep arch in your back.
- This is the Cat Pose, with your spine in a gentle forward bend.
Flow Between Cat and Cow Poses
- Inhale as you move back into Cow Pose, lifting your head and tailbone, and dropping your belly towards the floor.
- Exhale as you transition into Cat Pose, rounding your back and tucking your chin.
- Continue to flow between these two poses, synchronizing your breath with your movements.
Breathing
- Inhale as you move into Cow Pose, expanding your chest and front body.
- Exhale as you transition into Cat Pose, engaging your core and rounding your back.
Repetitions
- Repeat the Cat-Cow sequence for about 5-10 rounds, flowing with your breath.
- Feel the gentle movement of your spine and let your breath guide the rhythm.
Pro Tips
- Move mindfully: Practice the Cat-Cow Pose slowly and mindfully, allowing your breath to guide your movements.
- Focus on the spine: Pay attention to the sensations in your spine during the movements and try to create a fluid and smooth motion.
Wrap-Up
In the fast-paced world of athletics, it’s easy to get caught up in the pursuit of strength and speed while neglecting the importance of mobility.
However, an athlete’s true potential lies not just in power and explosiveness but also in the ability to move with grace and precision.
By dedicating time to athlete mobility exercises, you invest in your body’s longevity, ensuring it can withstand intense training and competition demands.