Introduction:
Arm bodyweight workouts are a pragmatic and compelling method for developing grit and toning muscles. These activities, which utilize your body weight as opposed, can be performed anywhere, making them a helpful expansion to any wellness schedule. They draw in various muscle gatherings, upgrading coordination and equilibrium. Activities, for example, push-ups and boards, increment bulk and further develop stance and lift digestion. No matter what your wellness level, consolidating bodyweight arm exercises into your routine can prompt huge upgrades in your wellness levels
Benefits of arm bodyweight workouts
Arm bodyweight workouts offer various advantages for people at all wellness levels. These activities are helpful, as they can be performed anyplace without the requirement for particular gear. They are likewise cheap, as no extra hardware is required. “arm bodyweight workouts” connect with various muscle gatherings, working on, generally speaking, wellness, coordination, and equilibrium. They can likewise assist with expanding digestion, prompting long-haul weight reduction and further developed well-being.
Consolidating “arm bodyweight workouts” into your gym routine can assist with developing muscle fortitude and better bone thickness, lessen the gamble of wounds, and work on athletic execution. These activities can be effortlessly changed to suit your wellness level, considering movement as you gain strength. Furthermore, “arm bodyweight workouts” can be joined with cardiovascular activities to improve calorie consumption and general wellness.
Some famous “arm bodyweight workouts” incorporate push-ups, rear arm muscles push-ups, boards, and arm circles. These activities target different arm muscles, assisting with conditioning and reinforcing the arms without the requirement for loads. By reliably consolidating “arm bodyweight workouts” into your daily gym routine practice, you can accomplish a very conditioned chest area and work on general wellness.
Five best arm bodyweight workouts
- Bicep curl
- Dip
- Arm Circles
- Inchworm
- Triceps push-ups
Bicep curl
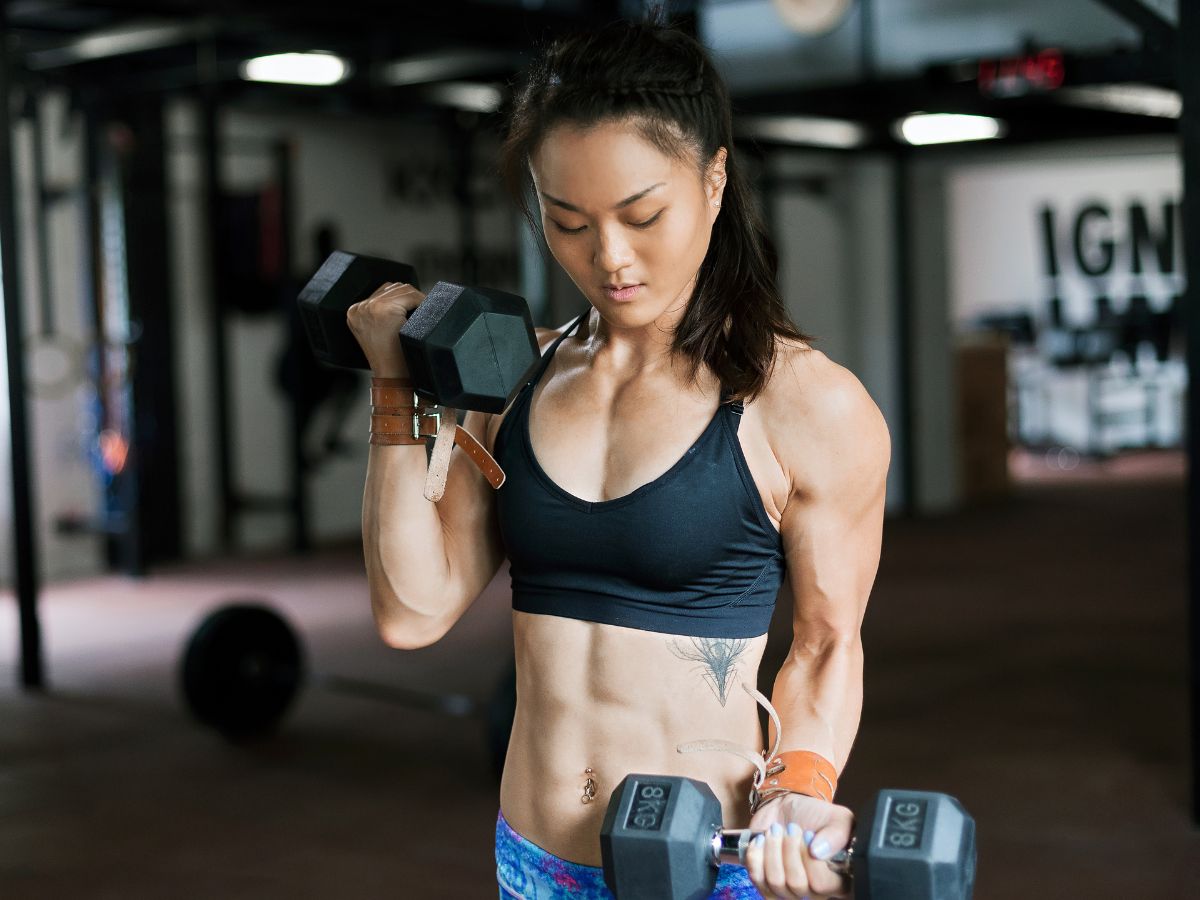
The biceps curl is a profoundly conspicuous weight-lifting exercise that works the muscles of the upper arm and, less significantly, those of the lower arm. It’s a brilliant activity for bringing about strength and definition.
Different gear and holds can be utilized for this exercise, including those utilizing barbells, kettlebell weights, dumbbells, opposition groups, or link machines. Twists are a run-of-the-mill exercise utilized in chest area strength preparation schedules.
How to do Bicep Curl?
Stand up straight with your feet shoulder-width apart. Hold a free weight in each hand, permitting your arms to hang by your sides, palms looking ahead.
Keep your chest area still and draw in your center muscles for solidness.
Start the twist by bowing your elbows and bringing the free weights towards your shoulders. Keep your upper arms near your body and your wrists straight.
Keep on lifting the dumbbells until they are near your shoulders or until your biceps are completely contracted.
Stand firm on the footing momentarily, crushing your biceps at the highest point of the development to expand the compression.
Gradually lower the dumbbells back to the beginning position, keeping up with command over the development.
Rehash the activity for your ideal number of reiterations. Normally, three arrangements of 8-12 redundancies are a typical reach for developing bicep grit and size.
Tips for Beginners:
For effective bicep curls, maintain good form: stand with feet hip-width apart, soft bend in knees, and dumbbells in each hand. Focus on the eccentric phase, extending as slowly as possible. This causes greater micro-trauma, stimulating more muscle growth. Avoid rapid lifting and lowering for high rep counts. Incorporate seated concentration curls for maximum bicep activity. Remember to rest between sets to prevent burnout.
Dips
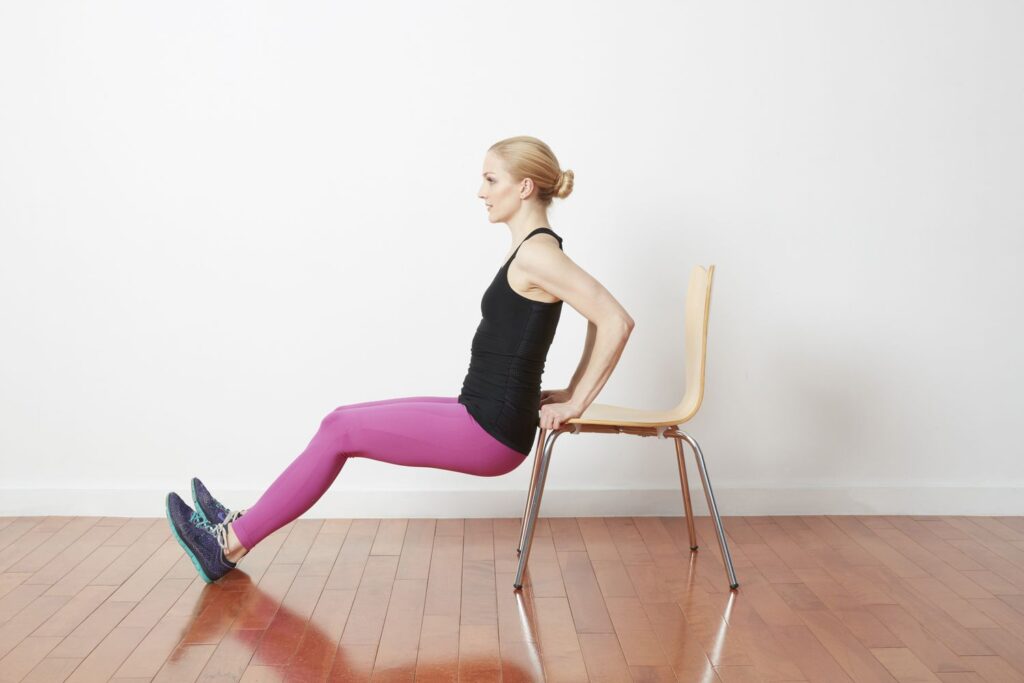
Dips are a kind of solidarity preparing exercise that expects you to lift your body weight with your rear arm muscles, deltoids, pecs, and rhomboid muscles. One sort you can do is a seat plunge, where you support your body weight from behind. For a rear arm muscle plunge, go through equal bars to lift yourself and down. In the event that you can’t plunge your full body weight yet, relax. Most rec centers have a machine that can help with plunges, so you don’t need to help your entire body weight. Expect to do strength-preparing exercises like these 2-3 times each week.
How to do Dip?
- Find equal bars or a plunge station and handle the bars with your hands.
- Bounce up and fix your arms, supporting your body weight.
- Lean your middle somewhat forward and twist your knees if necessary.
- Bring down your body by bowing your arms and keeping your elbows near your body.
- Plunge until your shoulders are underneath your elbows.
- Push your body back up by fixing your arms and locking your elbows at the top.
Tips for Beginners:
Warm-up: Consistently start your plunge preparing with a warm-up daily practice. Light running or vigorous activity followed by shoulder stretches will get your body heated up.
Proper Form: Keep your elbows near your sides to lessen the weight on the shoulders. Your head ought to be in accordance with your chest area, looking forward, not up, and your center locked in. Twist your legs at the knees while performing equal bar plunges.
Scope of Movement: You ought to go somewhat beneath lined up on every rep, so your shoulders go down only somewhat underneath your elbows. Be that as it may, try not to go excessively low, as it can cause injury.
Controlled Development: Try not to go excessively quick. It would help if you were slow and in charge during your plunge. At the point when you go excessively fast, the appropriate structure is frequently forfeited.
Grip: Your hold ought to be a manageable length. Preferably, plunge bars ought to be separated a good ways off, identical to your lower arm with hand outstretched, from elbow to fingertips. More extensive bars will likewise stress the chest.
Movement: Begin with simpler varieties like bowed knee seat plunges or straight legs seat plunges, and progressively continue toward additional difficult ones as your solidarity gets to the next level. At the point when you can complete three arrangements of 8, continue toward the following practice in the movement
Arm Circles
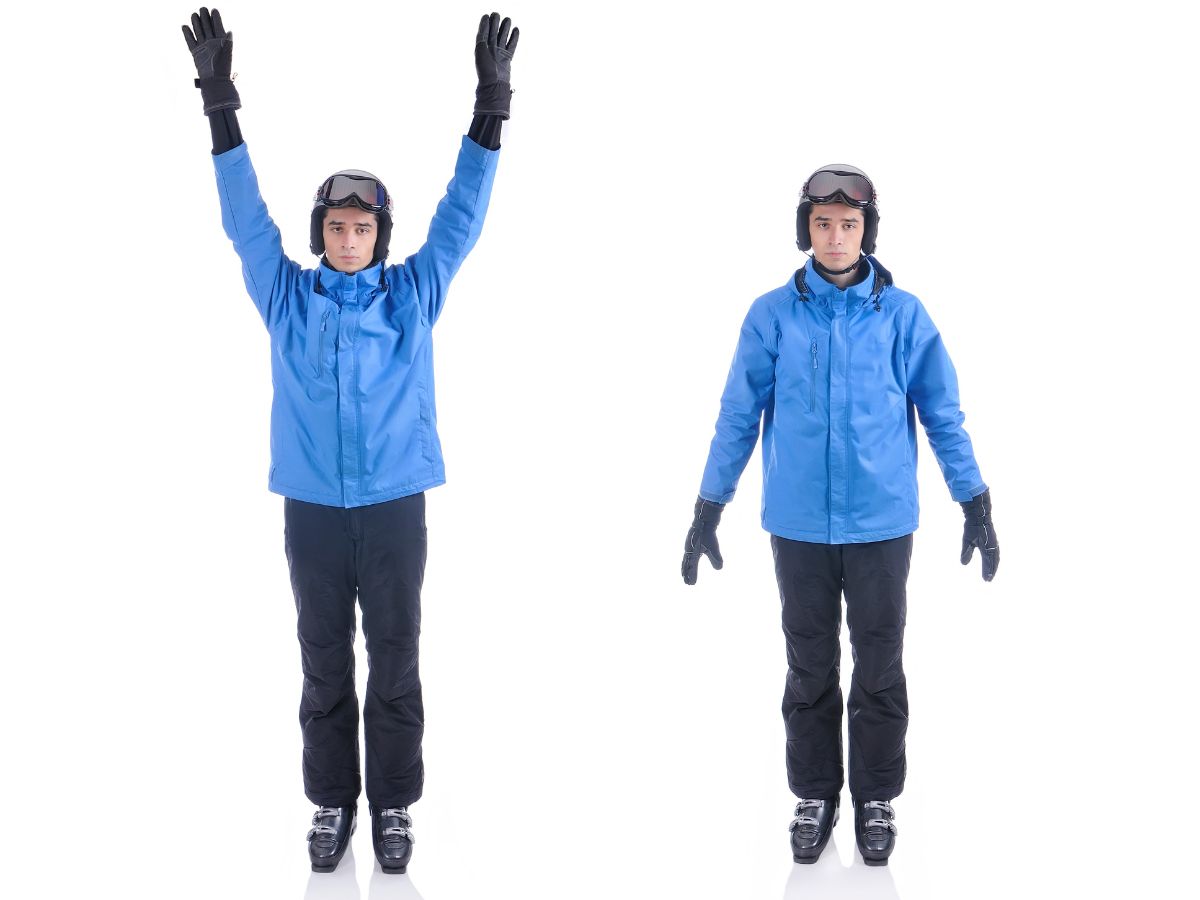
Arm circles should be possible whenever, anyplace. They should be possible while you are perched on your seat before your PC or when you are on your bed. They should likewise be possible by genuinely tested individuals who can’t walk and who use seats with wheels to move around.
As you become alright with the standard arm circles, you can perform them by holding loads.
Arm circles are perfect for individuals who use PCs for delayed periods. These incorporate a significant piece of individuals who go to workplaces, depending totally on work areas or PCs for their work. Without satisfactory extending of the arms, the shoulders, muscles, and ligaments of the arms can grow and turn out to be firm and unbearable after some time. The absence of arm stretches can expand the gamble of shoulder, arm, or hand injury.
How to do Arm Circles?
- Stand straight with your feet shoulder-width apart.
- Raise and stretch out your arms to the sides without bowing the elbows.
- Gradually pivot your arms forward, making little circles of around 1 foot in breadth.
- Complete a set in one course and afterward switch, turning in reverse.
- Each set should go on for around one moment, 30 seconds toward every path.
Tips for Beginners:
Proper Form: Stand straight with feet shoulder-width separated and stretch out your arms to the sides, lined up with the ground. Turn your arms in little circles, steadily expanding the size of the circles.
Controlled Development: Keep a controlled, smooth development all through the activity. Try not to rush or utilize energy
Draw in Your Center: Keep your center connected with your back straight, and keep a profound, smooth breathing example all through the activity.
Scope of Movement: Begin with little circles and steadily increment the size as your shoulders begin to relax and blood stream increments
Movement: As you gain strength, you can hold a bunch of light loads while doing this activity to build the test
Consistency: Mean to do arm circles as a feature of your warm-up everyday practice before any chest area exercise. They should likewise be possible during breaks on the off chance that you work at a PC for extensive stretches.
Pay attention to Your Body: In the event that you feel any uneasiness or agony, stop the activity right away.
Inchworm
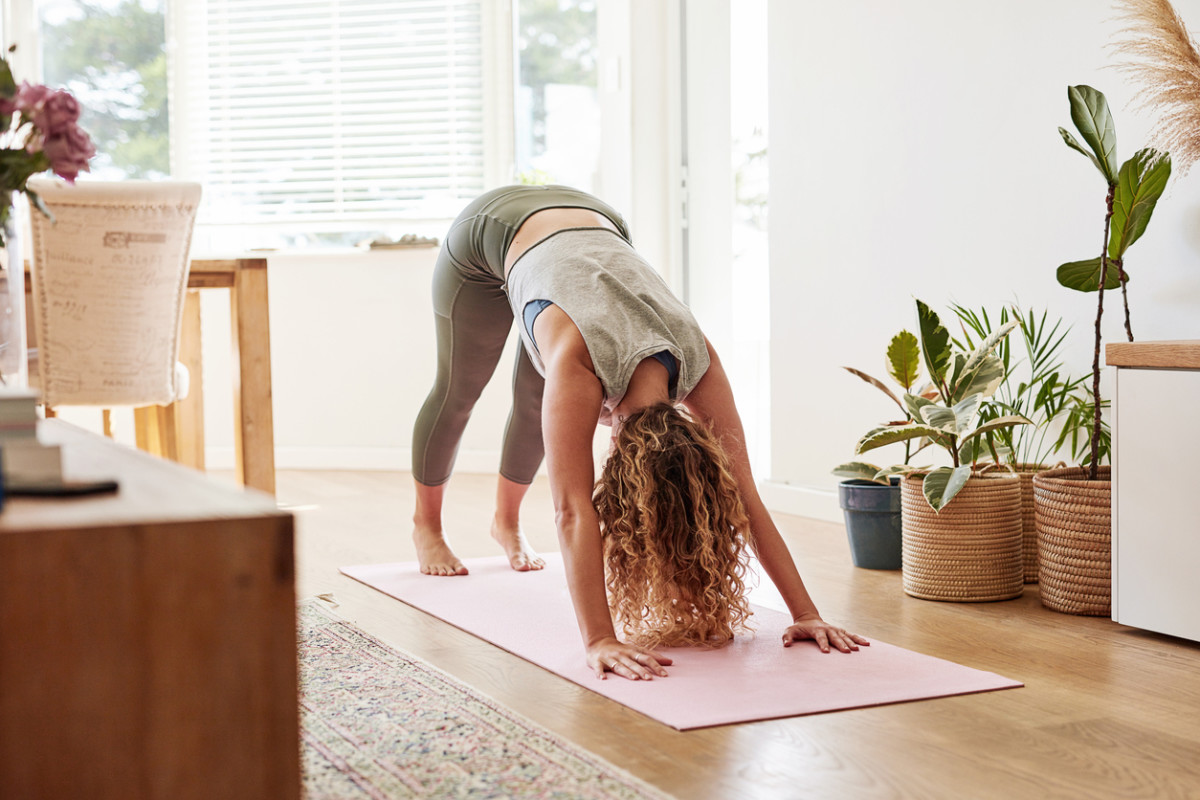
The inchworm exercise offers a tad of everything — it fortifies the muscles of your foremost chain (the front portion of your body) while extending the muscles of your back chain (the back portion of your body). Furthermore, on the grounds that it focuses on your whole body to some limit, it jump-starts the system. This makes it a fantastic move to integrate into a functioning warm-up before a strength preparation or intense cardio exercise schedule.
The actual development winds up closely resembling its name — an inchworm. You begin standing, arrive at your arms down toward the ground, walk your hands from your feet, enter a board-like position prior to venturing your feet forward toward your hands, and lastly, get back to a standing position. You then proceed with the worm-like creep for time or redundancies.
How to do Inchworm?
- Stand straight with your feet shoulder-width apart.
- Bend over and touch the floor with the palms of your hands.
- Walk your hands out as far as you can while keeping your legs straight, and pause. This should bring you to a high plank position.
- Walk your hands back up to the starting position.
Tips for Beginner
Proper Form:
- Stand straight with your feet shoulder-width apart.
- Twist around and contact the floor with the centers of your hands.
- Walk your hands out to the extent that you can while keeping your legs straight and delay.
- Stroll back up to the beginning position and rehash for the ideal number of reiterations.
Controlled Development: Keep a controlled, smooth development all through the activity. Try not to rush or utilize energy.
Draw in Your Center: Keep your center drawn in, back straight, and keep a profound, smooth breathing example all through the activity.
Scope of Movement: Walk your hands out to the extent that you can without losing structure. This will assist with expanding the adaptability in your hamstrings and the strength in your shoulders and chest.
Movement: As you gain strength, you can expand the test by adding a push-up partially through the development
Consistency: This means integrating the Inchworm practice into your gym routine daily schedule. It tends to be essential for a warm-up daily schedule or a center exercise.
Pay attention to Your Body: Assuming you feel any distress or agony, stop the activity right away.
Varieties: Fledglings can slide into Inchworms with twisted knees. By hunching down and afterward keeping your knees on the ground once you hit your board, you’re taking a touch of the strain off of your center.
Triceps push-ups
Tricep push-up is a compound activity that works for muscle bunches across your entire body. Perform tricep push-ups by holding your body in a high board position with your chest area and lower body framing a straight line; keep your hands straightforwardly underneath your shoulders, and lower your body until your elbows structure a 90-degree point close by your ribs.
How to do Triceps Push-Ups?
Start in a high plank position: Your hands ought to be straightforwardly under your shoulders, and your body ought to shape a straight line from your head to your heels.
Position your hands: Unlike a regular push-up where your hands are shoulder-width separated, for a rear arm muscles push-up, you really want to pull your arms in near your sides so your elbows are pointed back. A few varieties propose framing a jewel shape with your hands under your chest.
Bring down your body:
- Curve your elbows to bring down your body towards the ground.
- Keep your elbows near your body as you slide.
- Stop when your shoulders are in accordance with your elbows.
Push back up: Drive your hands into the ground to push your body back up to the beginning position. Guarantee your hips keep straight with your shoulders all through the development.
Rehash: Proceed with however many reps as you can while keeping up with an appropriate structure.
Tips for Beginners:
Proper Form:
- Start in a high-board position with your hands straightforwardly under your shoulders.
- Pull your arms near your sides so your elbows are pointed back.
- Bring down your body by twisting your elbows, keeping them near your body.
Controlled Development: Keep a controlled, smooth development all through the activity. Try not to rush or utilize energy.
Connect with Your Center: Keep your center drawn in, back straight, and keep a profound, smooth breathing example all through the activity.
Elbow Situation: Your elbows ought to be near your body all through the development. This will assist with focusing on the rear arm muscles all the more, actually.
Movement: As you gain strength, you can expand the test by adding varieties or expanding the quantity of reiterations. For instance, you can play out the rear arm muscles push-up on a downfall or with light loads on your back.
Alterations: Assuming that you find the activity excessively testing, you can adjust it by dropping to your knees. This will decrease how much weight you want to lift, making the activity simpler while focusing on the rear arm muscles.
Consistency: This means integrating the rear triceps push-up into your exercise routine everyday practice. It tends to be important for a chest area or full-body exercise.
Pay attention to Your Body: If you feel any uneasiness or agony, stop the activity right away.
Read More :